Rewards
BEFORE YOU START
Meet your new go-to accessory, the Cut The Cord Crochet Clutch, otherwise known as the Cord Clutch by Emily Reiter. We have 5 colors of Sari Ribbon Cording for you to put this easy crochet pattern to the test.
Get Your Kit HERE.
PROJECT DETAILS:
Skill Level: Easy. Project includes simple stitch patterns, and shaping.
Craft: Crochet
MATERIALS:
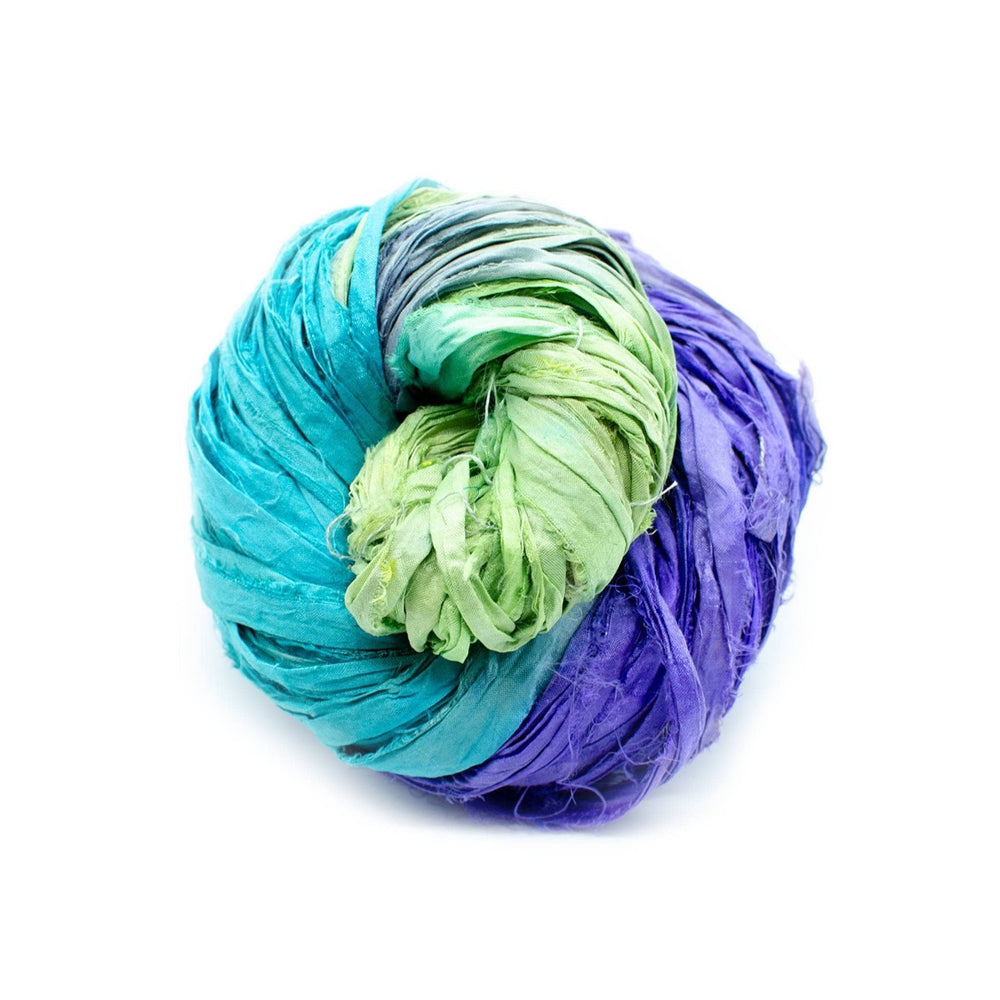
- 1 Skein of Darn Good Yarn Sari Ribbon Cording (Pictured in Atlantis)
- Hook US N15/ 10.00 mm
- 2 Stitch Markers
- Notions: Scissors, Yarn Needle, 1” diameter button, sewing needle and thread, liner material & straight pins (optional)
GAUGE
-
8 sc stitches = 4”, 8 rows = 4”
-
7.5” wide x 5.5” tall
NOTES:
The purse base is established by stitching on both sides of the starting chain, then the sides are worked in continuous rounds of back loop only single crochet. There is a round of slip stitches around the top and a chain loop for the button. A lining is not necessary for this purse, but I feel it always makes it feel more special.
INSTRUCTIONS
Ch 16
Round 1: Sc into 2nd ch from hook and next 13 ch, 3 sc into last ch, working on opposite side of starting ch work 1 sc in next 14 ch, 3 sc in ch at end, do not join - 34 sc
Round 2-10: sc into back loop only of each sc around, mark first sc of round if necessary to keep your place - 34 sc
Round 11: Sc back loop only into next 8 sts, sl st in back loop only into next 33 sts, ch 10, skip 1 st, sl st into next st.
Finishing: Secure the tail with a knot or two around a nearby stitch on the inside of the bag. Sew in tail, trim excess. With sewing needle and thread, secure the button at the top of the purse on the side opposite the button loop.
Optional lining: With liner material folded in half, place the purse on top of the lining with the bottom of the purse at the fold. Trace a line on the material around the purse and cut out the material. Hem the narrow ends ¼” then with right sides on the inside, seam the sides. I used the sewing machine for the hem & seams. Secure and trim the sewing threads. Place the lining inside the bag matching the bottom corners from the inside and spread the lining out as much as possible to fill the inside of the bag. Pin the top hem around the purse with straight pins. Pin it about ¼” down from the top of the purse. Using the sewing thread and needle, whip stitch the lining to the purse removing pins as you reach them. The best advice I read about linings was that you want enough material so that the actual bag holds your items, not the lining.