Rewards
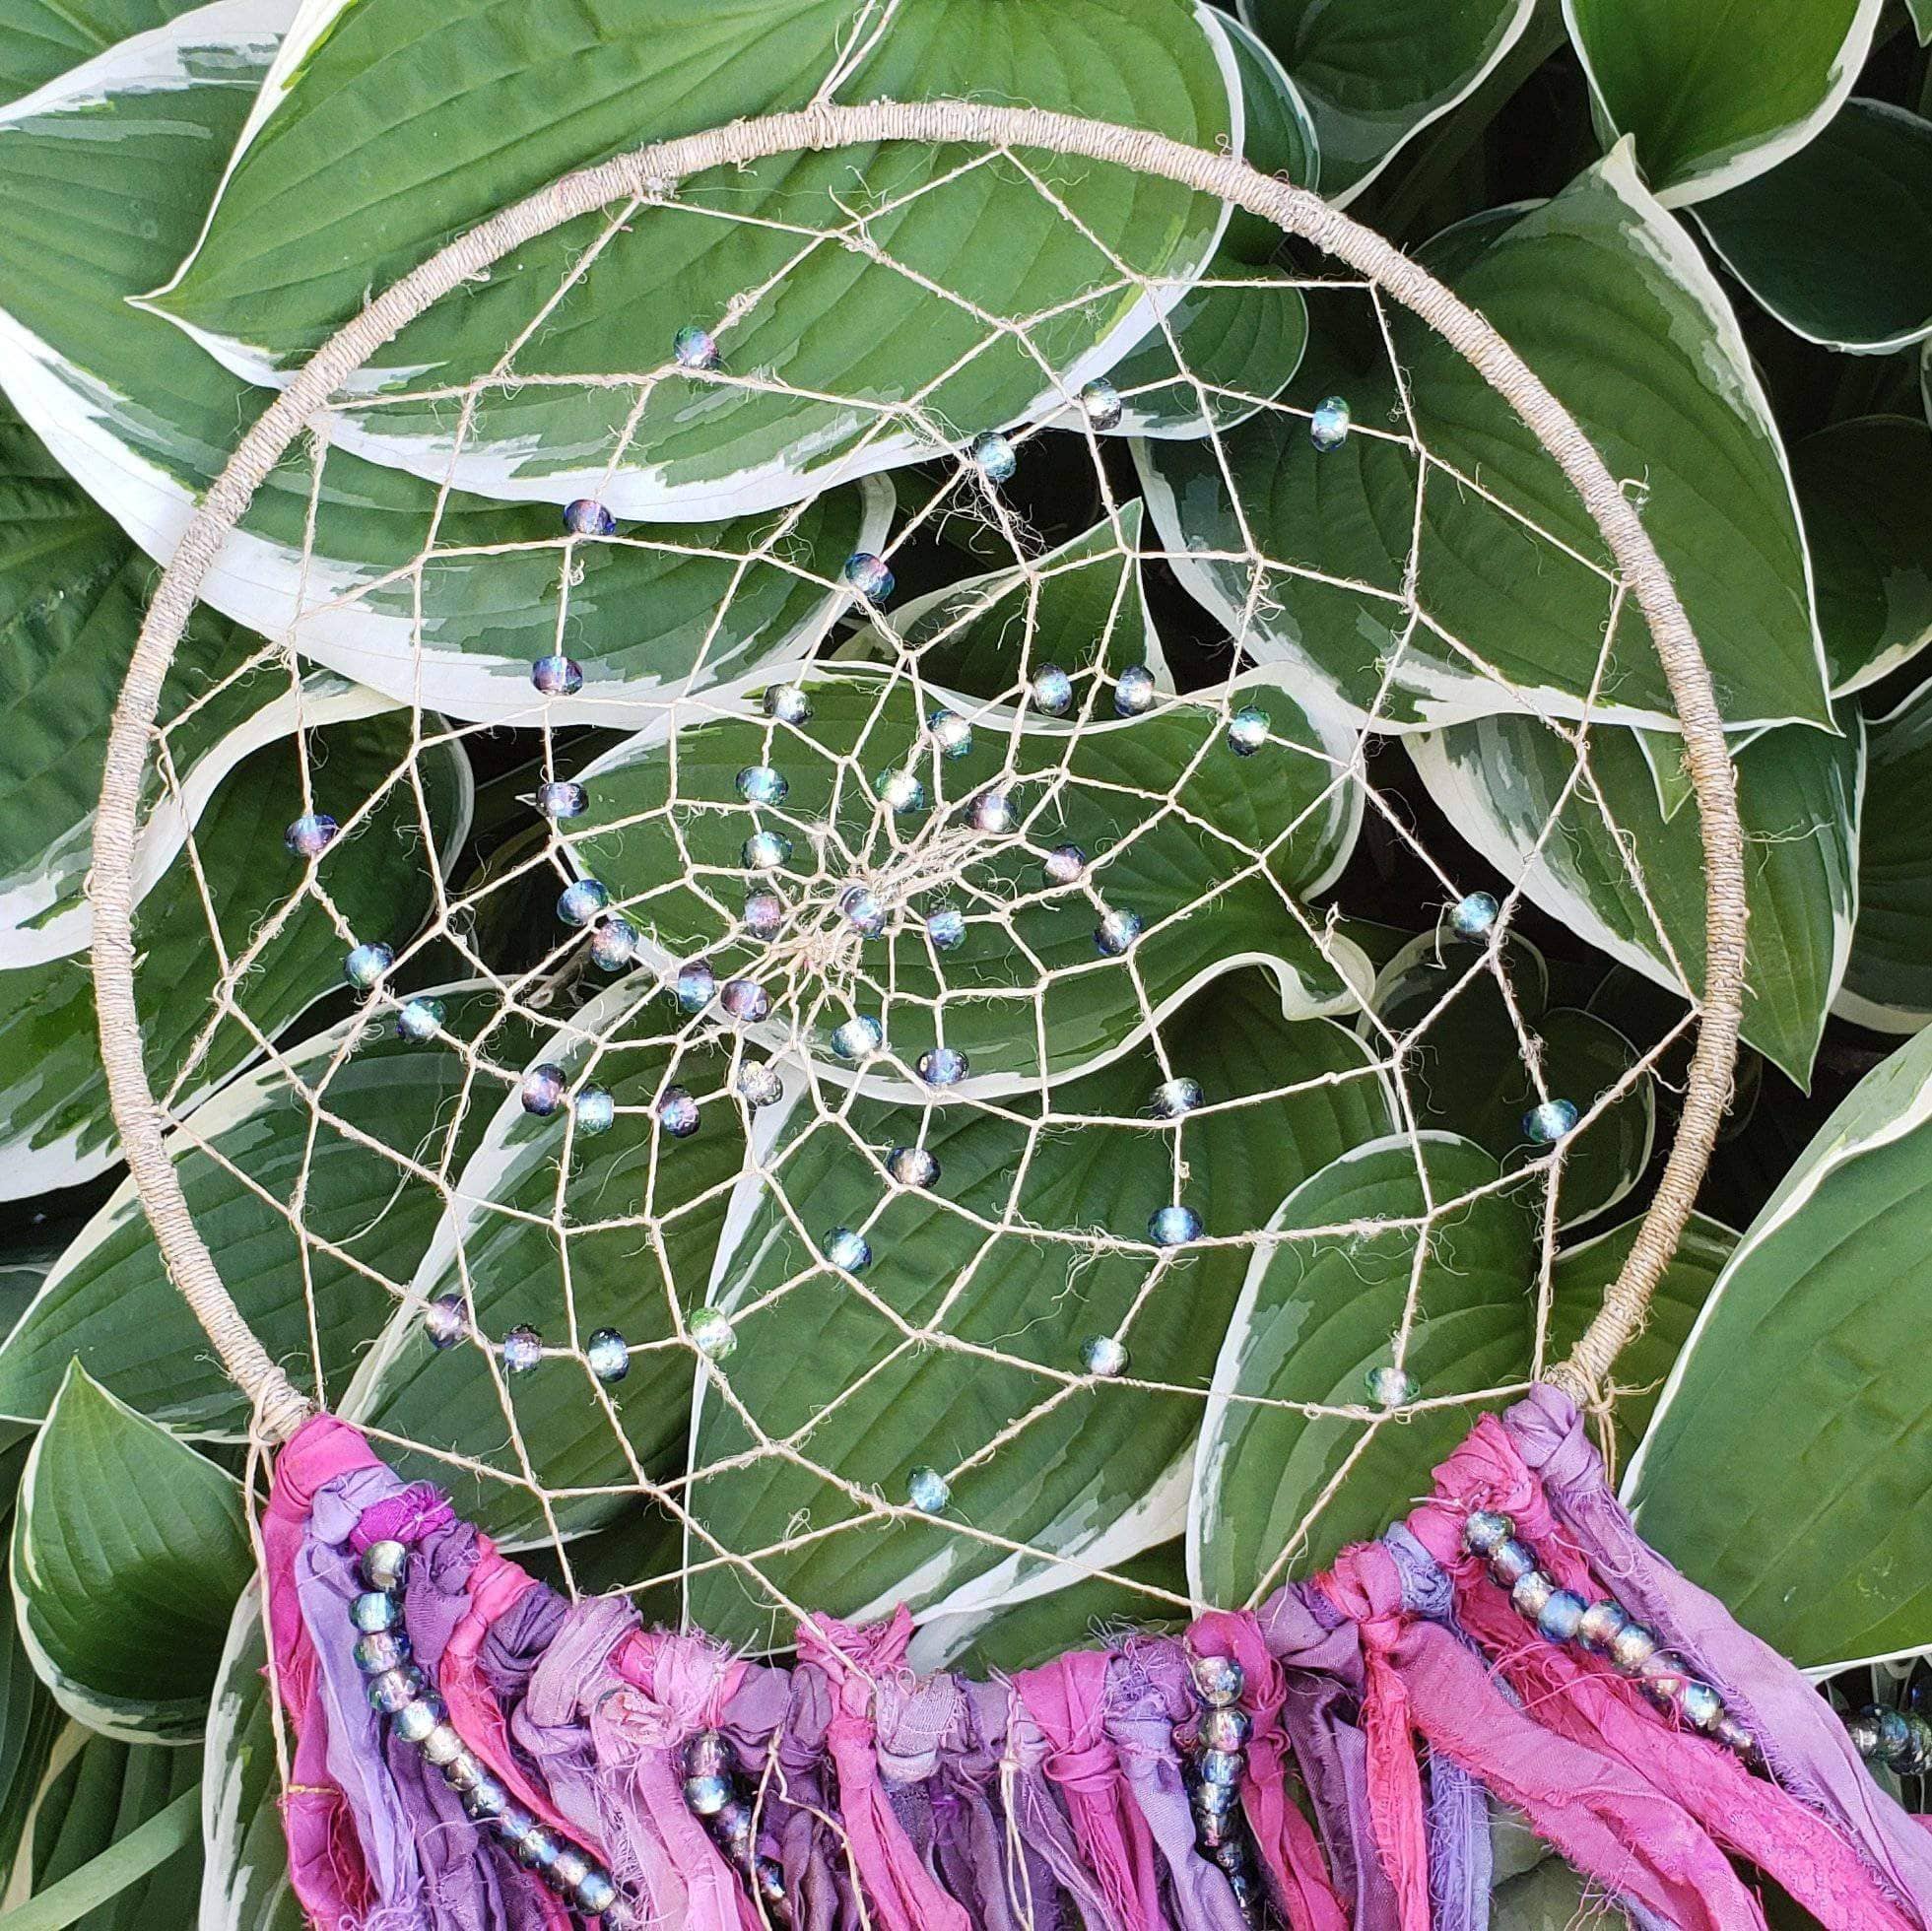
BEFORE YOU START
Relax and have fun making your own dreamcatcher. Each one turns out different and they have no limits when it comes to decorating them. You can add as little or as many fibers as you want. Even beads, stones, feathers, the list goes on. They can be big, small, detailed, or simple. Remember that your dreamcatcher has a purpose, so while you are making it be sure to stay calm and positive. This energy will give the dreamcatcher its power so take your time and have fun. Designed by the awesome Kay of @ACupOfCrochet
Get your free DIY Dreamcatcher pattern here.
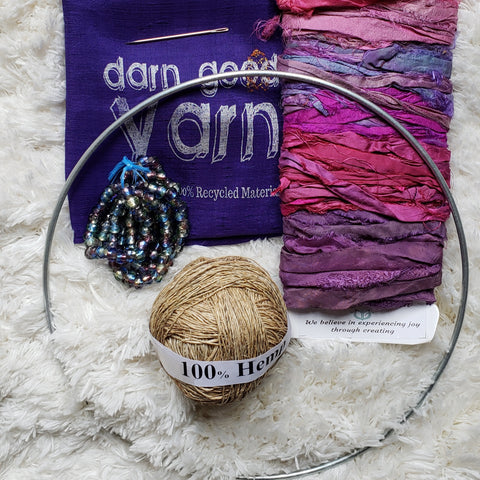
MATERIALS:- 1 Ball of Single Ply hemp
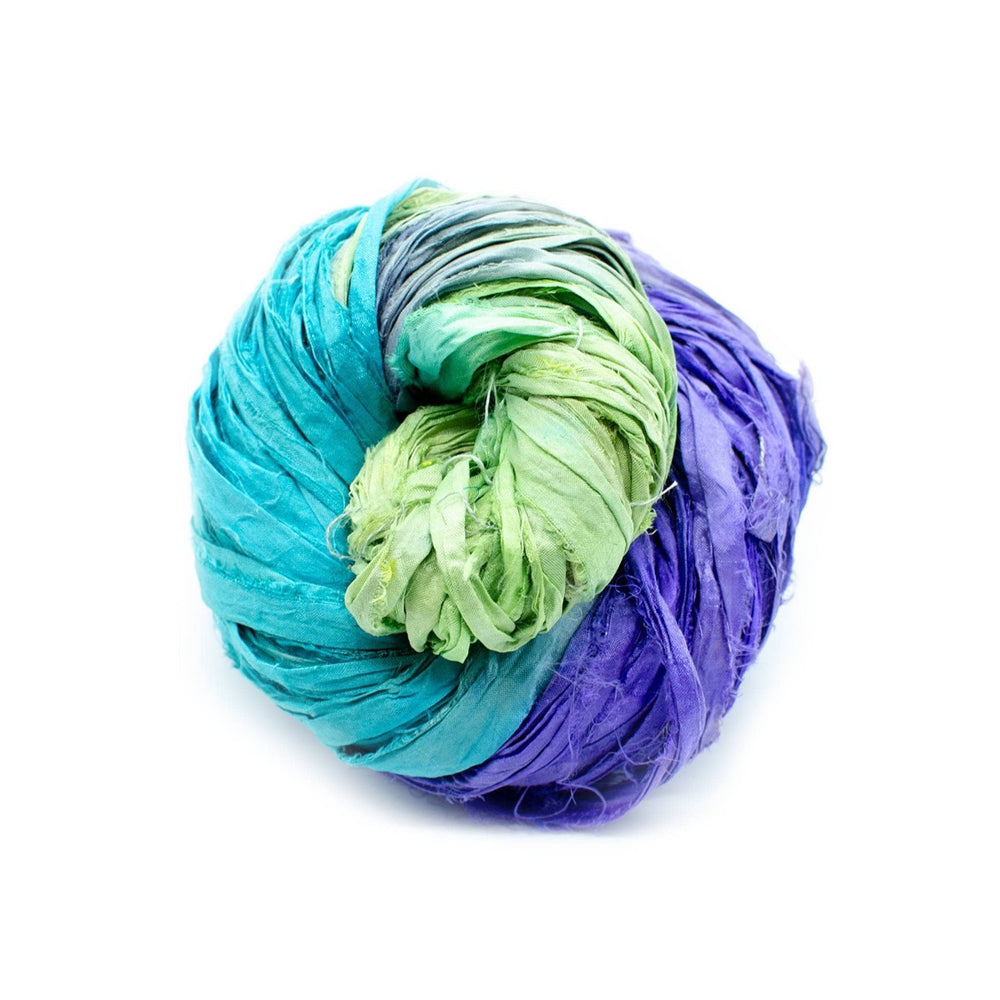
- Sari Silk Ribbon Sample Card (Wildflower)
- 10 inch metal hoop
- Darning needle
- Beads (optional)
Find the Perfect Sample Ribbon Card for your Project:
NOTES
Each dreamcatcher will turn out unique. The slightest shift in sizing can make the webs look different. Dropping beads in different spots can create different patterns. All of this is perfectly fine. Even if there are flaws in your finished piece, that is what makes it special. What is most important is the energy that you put into it while you are making it.
SIZE:
Each dreamcatcher will vary in length depending on how long you cut your ribbon. The dreamcatcher you see here measures approximately 25 inches from the top of the hoop to the bottom of the ribbon.
STEP-BY-STEP VIDEO TO MAKE YOUR DREAMCATCHER:
INSTRUCTIONS
1. Wrapping the hoop
Using the 1 ply hemp, start by securing the end of the hemp to your hoop with a double knot.
Wrap the hemp around the hoop by picking up the ball from the center of the hoop and bringing it up and around to the back.
Try to cover all of the metal with the hemp. This part may take a while but it's going to be worth it.
Once you wrap all the way around the hoop, secure the hemp by tying the end from the beginning to the end you finished with using a double knot so it doesn't unravel.
2. Weaving the center web

First start by winding a smaller ball of hemp from the larger ball. You want the ball to be able to fit through the gaps as you work around the center.
If you are using beads in your dreamcatcher, thread the beads onto the small ball of hemp. This way you can easily drop them into place as needed.
Now you can start weaving the center web.
Secure the hemp to the hoop with a double knot.
Pick up your hemp and beads, bring it up and over to the back of the hoop.
Leave a gap in the center.
Pull the hemp and beads through the gap from the back to the front.
Leaving about an inch gap to work into when you go around in the next round.
Do this all the way around.
Leave about an inch space between the last gap you create and the first gap.
To continue on you will be working into the first gap.
Bring your hemp and beads under the hoop and pull it up through the gap.
Bring your hemp and beads under the hoop again and pull it up through the next gap, dropping a bead if desired.
Bring your hemp and beads under the hoop again and pull it up through the next gap.
Repeat this around and around until you get close to the center.
You may need to stop and rewind your ball of hemp from time to time. That's ok. Don't forget to keep your energy positive.
While weaving my dreamcatcher center, I dropped a bead in every other space. You can drop them wherever you like on yours to create different designs.
As you get closer to the center it may be necessary to use your needle to weave the hemp in and out of the gaps.
Make sure you continue by working from under and pulling the hemp up through the gaps.
Once you're able to pull your center closed, go ahead and tie off. Use your needle to pull the hemp through a gap and tie a double knot.
If you'd like you can add some beads to the center before finishing off.
3. Decorating
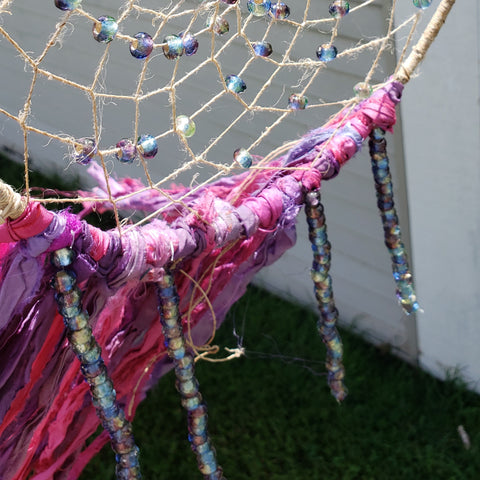
For my dreamcatcher I used
-
Sari Silk Ribbon in Wildflower
-
Pre-strung beads
-
1 ply hemp
Start by cutting the ribbon into strips.
I cut my strips approximately 30 inches long. You can cut yours as long or as short as you'd like.
To hang the ribbon from your dreamcatcher, fold the ribbon in half. Insert the top loop where the fold is through the front to the back of the hoop. Pull the ends through the loop and tighten the knot.
Do this with all of your ribbon.
I also ended up tying some pre strung beads and a few pieces of the hemp to the bottom of my dreamcatcher. Feel free to have fun with yours too.