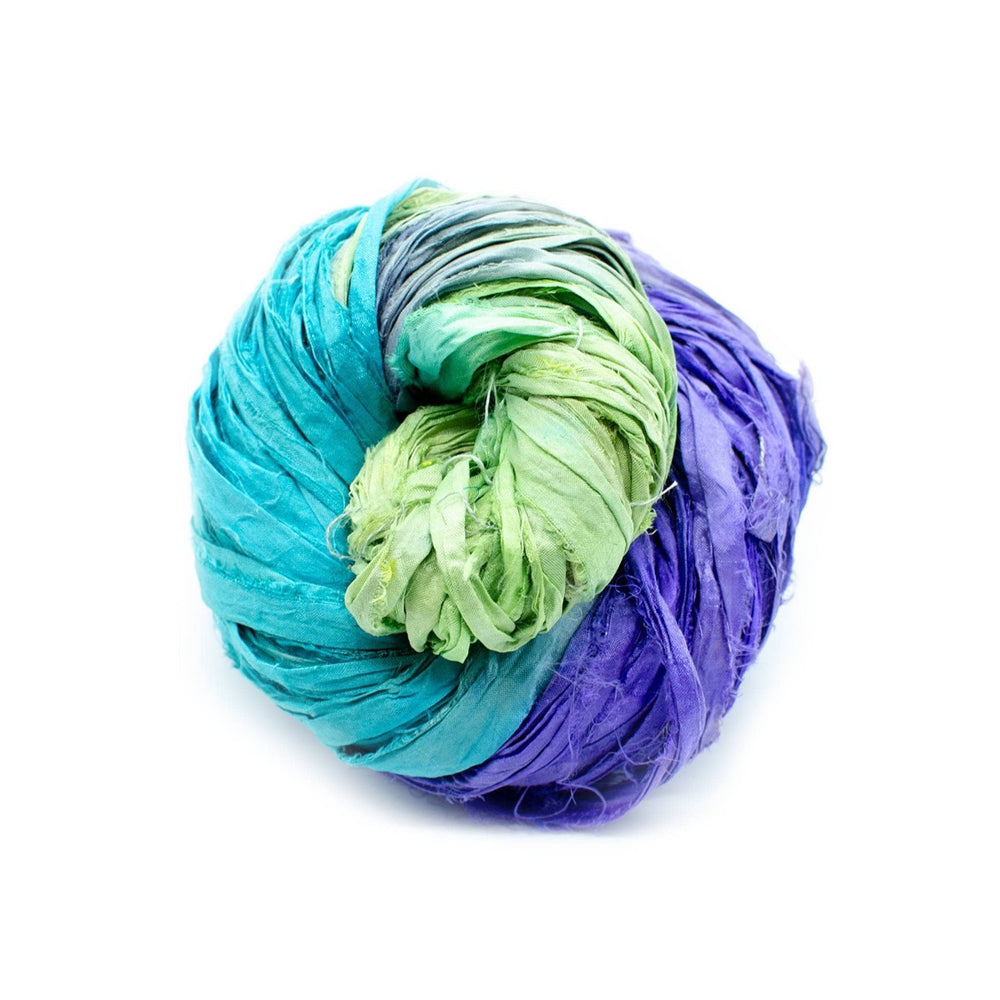
Hey crafty people this is K from a Cup of Crochet and today I'm going to teach you how to make the X's and O's beanie. The pattern for the X's and O's on the beanie is the same pattern that was used on the mittens. So be sure to check out the X's and O's mittens pattern so you can make your own set. The materials that you will need for this is, a four and a half millimeter crochet hook, a darning needle, scissors and the Yickity Yak Nepal Yak wool yarn from Darn Good Yarn.
So let's get started. So to begin making our beanie we're gonna start with a magic circle. If you do not know how to start with the Magic Circle, you can chain three and work your starting stitches into the first chain. We're gonna start with 12 double crochets into the center of our circle or into the first chain. So go ahead and work your 12 double crochets and then meet me back here when you're finished.
For the next round we are going to be working our X's and O's but we also need to increase in every stitch. So in order to do that we will work a double crochet into the first stitch and then going into that same stitch we're going to work a bobble.
We'll do a double crochet increase into the next stitch so double crochet two into the next and then we're going to be making our X but we need to make sure that we're increasing. So to increase in an X we're only going to skip one double crochet, and work our first front post treble crochet. So skip one double crochet and work a front post treble crochet around the next stitch and then chain one, that was a stitch plus an increase. Now we'll go back to the six stitch that we skipped over. We'll work our other front post treble crochet around the skip stitch, and then we will do a double crochet into the same stitch that we work the first front post treble crochet around, and that will be another stitch with an increase. You got to make sure that you're working that next double crochet into the top of the double crochet we did the front post treble on and not the stitch next to it or else that will throw off your stitch count. So then we're going to repeat that pattern all the way around by doing a double crochet and a bobble stitch. Double crochet increase doing our X by only skipping one and then working the double crochet into the same space above the first front post treble. So go ahead and do that and then meet me back here and we'll do the next round.
Alright so to do the next round we're going to work double crochets continuing on with our increases, increasing every other space so work a double crochet and then a double crochet increase double crochet double crochet increase making sure that when we get to the chain ones we're working our stitches around the chains. The chains count as stitches. So continue on with this pattern of a double crochet, double crochet increase and meet me back here when you're finished.
Alright so to begin the next round we are going to be working our X's and O's while also continuing with our increases. So to do that we will start with a double crochet into the first stitch. We will work a double crochet into the next stitch. And then to continue on with our increases in the next stitch we will work a bobble stitch and a double crochet. Then we're going to work a double crochet into the next stitch.
Now we need to make our X with an increase so to do that we're only gonna skip one stitch and work our first front post treble crochet. So skip one, front post treble crochet, chain one, go back to the one we skipped and work another front post treble crochet. Then work a double crochet into the next available stitch. We don't need to go into the top of the first front post treble crochet stitch like in the previous round we need to go into the one next to it. So now we'll continue on with that pattern of working double crochet, double crochet and then do an increase with a bobble stitch and a double crochet. Work a double crochet into the next stitch, then we'll work our X with our increase and we're only going to skip one if we're doing the front post treble. Chain one front post around the skip stitch and repeat that all the way around. So do that and then meet me back here when you're finished.
For the next round we're gonna do a round of double crochets. Making sure that we keep going with our increases. For this round we will be increasing every three stitches but we will start with our increase so double crochet two into the first stitch. This way we stagger our increases a bit and it'll give it a more round shape instead of a boxy shape. So now we will do a double crochet in each of the next three stitches. Then work a double crochet increase. Make sure that when we're working around and we get to the chain ones, that we're working our stitches around those chains. So do that working three double crochets and then an increase, all the way around and meet me back here when you are finished.
Alright so this next round may be a little bit complicated to follow but if you can get the pattern it'll make it a lot easier. We're gonna continue making our X's and O's while doing our increases. We’ll be increasing every four stitches. So we'll start this round with a double crochet in the first stitch. Double crochet in the next stitch. To keep staggering our increases we will work a bobble stitch and a double crochet into the same stitch. Next we'll work a double crochet and in the next space. Now we'll be making an X without an increase so to do that we will skip two stitches and work a front post treble crochet. So skip two double crochets and work a front post treble crochet. Chain one go, back to the first stitch that we skipped and work our other front post treble crochet. Now we will work two double crochets for increase into the next available stitch
In the next stitch we will do a bobble. Double crochet in the next space, double crochet in the next space. Now we need to make an X with an increase so we'll be only skipping one stitch this time. So skip one double crochet and do your first front post treble crochet. Chain one go back to the stitch that we skipped and work our other front post treble crochet. Double crochet into the next available stitch and then that created our increase that we needed there within the X.
Now we started the next part, double crochet into the next space. Bobble stitch in the next space. Double crochet into the next space, double crochet in the next space. Now we need to do an increase within our X. So skip one, do a front post treble crochet around the next stitch. Chain one, go back to the one that we skipped, and do a front post treble crochet and that is the pattern for this round so if you repeat those steps all the way around and I meet me back here we can start the next round!
I know that round was just a little bit complicated but if you were able to follow the pattern and see the pattern that was in there then it should have been a lot easier for you. For the next round we're gonna do a round two double crochets continuing with our increases, and we're going to increase every five stitches so do a double crochet in each of the next five stitches. Then do a double crochet increase. Make sure that when we get to our chains that we are crocheting around the chains. So go ahead and do that, doing double crochet in each of the next five stitches and then a double crochet increase and meet me back here when you are finished.
For the next round we are going to do another round of the X's and O's continuing on with our increases. For this round we are going to increase every six stitches. So to begin, we will do a double crochet in the first stitch then we will work a double crochet into the next stitch. In the next stitch we will do a bobble. Double crochet in the next stitch, double crochet in the next stitch and now we need to do an increase so to do the increase within our X we are going to skip one and do a front post treble crochet. Chain one, go back to the one that we skipped, let's do our other post treble crochet and double crochet in the next stitch. That's the pattern, two double crochets, bobble stitch, two double crochets and increase within the X. So repeat those steps all the way around and then meet me back here when you're finished.
The next round is going to be our last round of increases. We are going to increase every seven stitches and this is going to be a round of double crochets. So start with your double crochet increase and then double crochet one in each of the next seven stitches. Make sure that when we get to the chain ones that we're working our double crochets around the chains. So repeat that all the way around, double crochet seven, and then an increase and then meet me back here so we can start building up our hat.
The next few rows are going to be a repeat of X's and O's without increases and double crochets without increases. So our first round is going to be a round of X's and O's without increases we're going to do a double crochet in the first stitch, double crochet in the next stitch. We will work a bobble stitch in the next. Double crochet in the next space, double crochet in the next space and now we're going to create an X without an increase so to do that we're going to skip two double crochets do our front post treble. Chain one, go back to the first double crochet that we skipped. That middle one is always going to be free do your front post treble around that first skipped one and then double crochet into the next available stitch.
Double crochet, Bobble, double crochet, double crochet and your X without an increase by skipping to front post treble chain one, go back to the first one you skipped, front post treble. So repeat those steps all the way around and meet me back here when you are finished.
So the next round will be a round of double crochets without increases so just double crochet one into the top of each stitch all the way around making sure that when we get to the chain ones that we work a double crochet around each chain. So go ahead and double crochet and each stitch all the way around and meet me back here when you're finished.
So after we finish that round we can start seeing the shape of the hat kind of form, it starts to bowl a bit. Now we're just going to continue on with this pattern. We're gonna do a round of the X's and O's without increases and then a round of double crochets without increases. You repeat that until your hat is long enough leaving about two inches of space for the brim. So go ahead and make your X's and O's and your double crochet rows and then meet me back here so we can do the brim.
I'm going to repeat these rows two more times. So once we get finished with all of those rows and we're happy with the length of our hat leaving about two inches of space for our brim. We can tie off and change colors if we want to. If you don't want to change colors just keep going with the rest of the pattern with the color that you're using. Start by slip stitching onto your hat and work a single crochet. We're going to work a total of six single crochets. Now we will single crochet three stitches together and this is going to give our hat a nice little effect right along the brim. So a single crochet one in each of the next six spaces, and then single crochet each of the next three stitches together.
We're gonna pull up a loop, pull up a loop from the first one, pull up a loop from the second one, pull up a loop from the third one, yarn over and pull through all four of those loops. We're gonna continue that pattern all the way around and then meet me back here. Once we finish the round of single crochets with the decreases we can see the structure of the hat really take shape now. So from here we can start working on the brim.
For the next five rounds you're gonna start with a double crochet in the first stitch, and then you will alternate front post double crochet in the next stitch and then back post double crochet in the next stitch. So you will alternate that all the way around doing a front post double crochet and then a back post double crochet. When you get to your decreases work those normal, and you'll repeat this for five rounds. You'll end up doing the front post double crochets around the front post double crochets and the back post double crochet around the back post double crochets. So go ahead and do this for your five rounds and then meet me back here so we can do the last round of our beanie.
So once you have your front post back post alternating double crochets finished, for your five rounds. Our last round is going to be a round of single crochets. So go ahead and single crochet one and each stitch all the way around. Then meet me back here so we can finish off our beanie.
Alright so when we're done we can cut our yarn, grab our needle and sew in our ends. Once your ends are all sewn in, you can go ahead and add a little pom on top if you'd like I use some of the leftover yarn I had to make mine and I just tied it right on top. I really hope that you enjoyed this pattern.
Thank you so much for watching my tutorial, I hope you liked it! Don't forget to check out the X's and O's mittens pattern as well as the X's and O's cowl pattern. Thank you so much to Darn Good Yarn again for this opportunity, and I hope you all have a wonderfully crafty day!
 Rewards