Rewards
BEFORE YOU GET STARTED
Personalize your living or work space with this simple and unique DIY. Make it yours by picking a quote that speaks to you. There are literally a gazillion quotes on Pinterest to choose from. This tutorial is renter-friendly, meaning that it won't leave your walls with a bunch of little holes! It was designed by the talented Rachel Castro, a DIY'er, designer and photographer local to Upstate, N.Y.

Craft: DIY
Skill Level: Beginner
Note from Artist: This is an easy project, but does take some time, so patience is a virtue! I found it best to work on a few words a night (rather than do in one sitting) OR stick to a shorter quote.
MATERIALS:
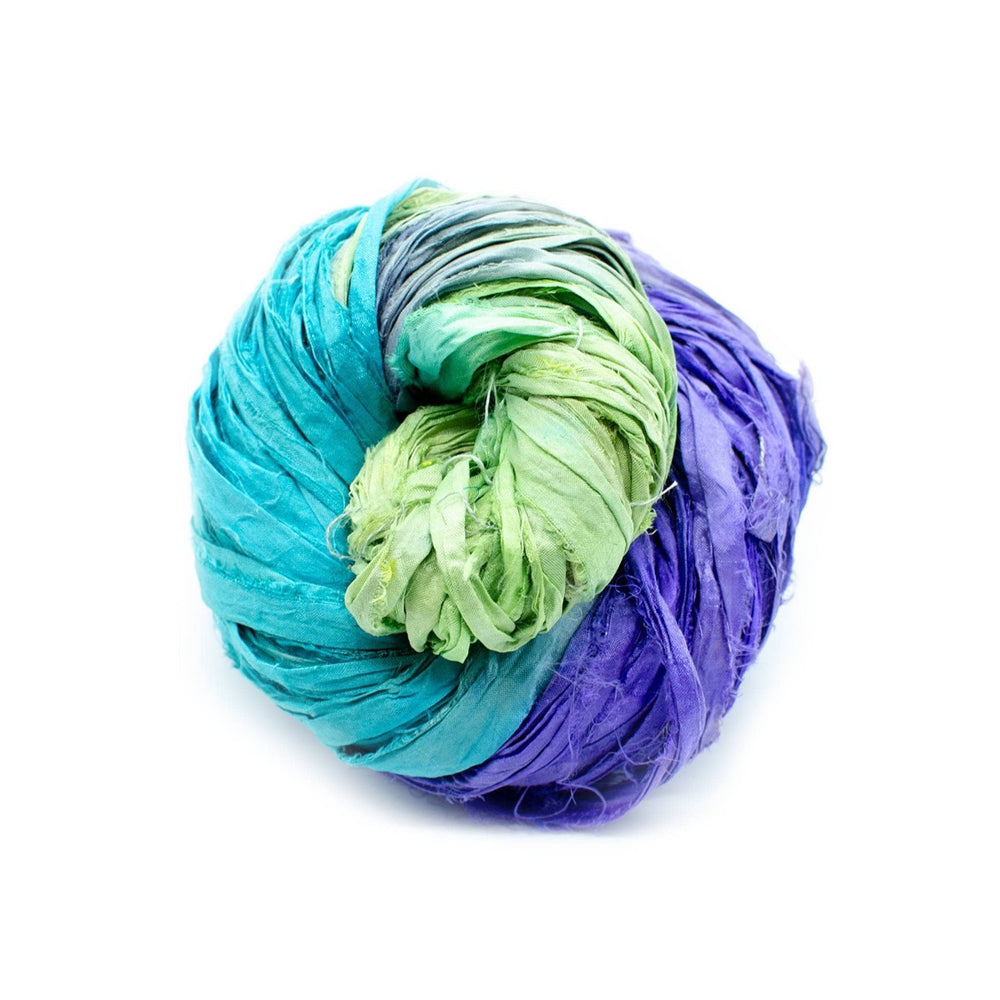
- 3 Skeins of Darn Good Sport Weight Linen 2-Ply Yarn (peacock turquoise, purple, and cadet blue were used in this tutorial)
- Elmers 20x30” 1/2 inch Foam Board
- 1 inch Straight Pins
- Quote Print Out
- Scissors
- Tape


Step 1: Pick your quote, print & cut out your words
It’ll make your life so much easier to pick a very bold, blocky font. Also, the bigger the font size the easier as well. After you’ve laid out your quote in word or other program, print it out.
Start by cutting out all your words for your quote. Trim as much of the white space as possible, as this will help you space your your words better.
If you’d like to do the quote I’ve featured, here’s a download that’s ready for print for you!

Step 2: Tape your quote into place
Line up and space our your words as you like, then tape them down to temporarily secure them.
Note: I find it easiest to complete steps 3- 5 a few words at a time before starting again. That way your arm or clothing isn’t getting caught on pins as your going!

Step 3: Add the pins
Start by pushing a pin in the first corner of the first letter. When you push through the foam board, you’ll feel when it hits the back edge. Stop there! Don’t push it all the way through the board. It’s best if you push it in as straight as possible.
Add a pin in each corner or intersection of a letter. You can also add extra pins for longer gaps between the sections of the letter. Don’t forget the inside sections of a letter.
Double check that you haven’t missed any letters with pins because you won't have the paper to reference past this stage.

Step 4: Carefully rip off the words
It’s important to remove the paper words before you start wrapping the yarn or it’s nearly impossible to remove! Carefully rip the paper and remove it. If it’s challenging in a spot you can take out a pin, then place it back in the same hole once the paper is gone.


Step 5: Wrap your Yarn
Start by using a single knot on one of the corners of your first letter. Then choose your patch and wrap around the pins, criss-crossing to your liking. I find it best to start with the first or last letter in the word, whichever is easier to pick out; like an E, L or A. Curvy letters like U, B and S are much more challenging to see.
If you don’t like the way the letter is looking simple unwrap and restart with a different direction.
Once you’ve finished your letter, finish it off by doing another single knot but make sure it’s at the exact spot of your end pin, so it’s taught and doesn’t unravel. Trim the extra pieces as close to the knots as possible.
Switch up your yarn colors to put more emphasis on certain words or to add variety!


Step 6: Add command strips & hang
Once you’re done, add a few command strips to the back of your poster board and hang it! If you ever want to do a new quote, you can recycle your board by simply taking out all the pins and using the backside of the board.