Rewards
BEFORE YOU START
WARNING: this baby hippo will lead to smiles due to an overwhelming sense of cuteness.
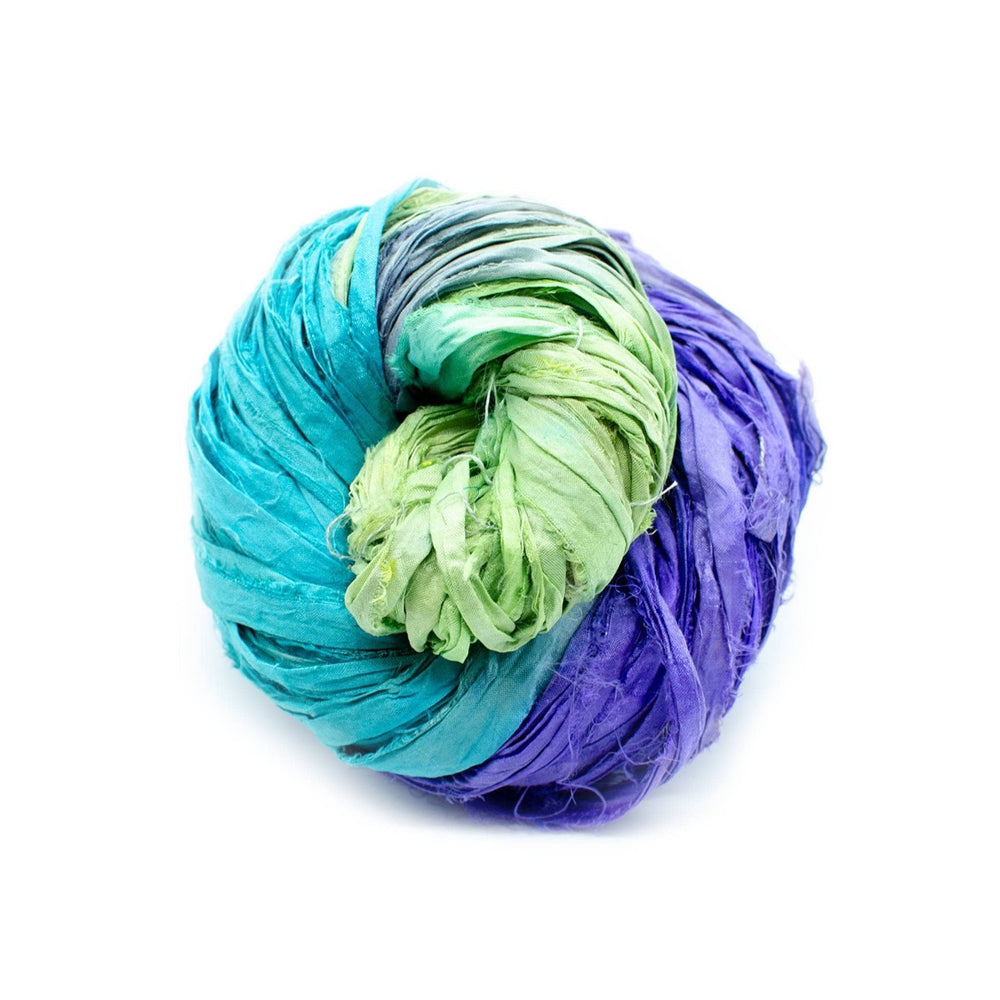
This adorable and easy crochet pattern was designed by the one and only, Kay Wiley of @ACupofCrochet using our Super Bulky Recycled Silk Yarn.
![]()
Level of Difficulty: Easy
MATERIALS:
-
2 Skeins DGY Super Bulky Recycled Silk Yarn
-
US J/10 (6 mm) Crochet Hook (not included)
-
Stuffing (not included)
-
Safety Eyes (not included)
-
Stitch Markers (Optional, not included)
-
Tapestry Needle and Scissors (not included)
PATTERN NOTES:
- A stitch marker may be helpful to keep track of stitch count.
-
Hippo body pieces frequently begin with the magic loop method. This technique is also called the magic ring, or drawstring ring and many helpful videos can be found on youtube. If you do not want to use a magic circle, you can CH 2 and work starting stitches into the first CH.
-
Stitch Counts per row are in <brackets>
ABBREVIATIONS:
CH(S): Chain(s)SC: Single Crochet
INC: Increase
DEC: Decrease
HDC: Half Double Crochet
DC: Double Crochet
ST(S): Stitch(es)
BODY PATTERN:
Begin with a magic circle and work in continuous rounds.
Begin: Start with a magic circle and SC 8 into center. Pull circle closed.
Round 1: 1 Sc inc in each stitch around <16>
Round 2: (Sc, Sc inc)* around. <24>
Round 3: (Sc inc, Sc 2)* around. <32>
Round 4: Sc in each stitch around. <32>
Round 5: Sc in each stitch around. <32>
Round 6: (Sc dec, Sc 2)* around. <24>
Round 7: Sc in each stitch around. <24>
Round 8: Sc in each stitch around. <24>
Round 9: (Sc, Sc dec)* around <16>
Round 10: Sc in each stitch around. <16>
Round 11: Sc in each stitch around. Start stuffing firmly. <16>
Round 12: (Sc dec)* around <8> Finish stuffing firmly.
Finishing: Fasten off and use your needle to sew any remaining hole closed.
Head Pattern
Begin with a magic circle and work in continuous rounds.
Begin: Start with a magic circle and SC 8 into center. Pull circle closed.
Round 1: Sc inc in each stitch around <16>
Round 2: (Sc, Sc inc)* around <24>
Round 3: Sc in each stitch around.<24>
Round 4: Sc in each stitch around. <24>
Round 5: Sc in each stitch around. <24>
Round 6: (Sc dec, Sc)* around <16>
Round 7: Sc in each stitch around. <16>
Round 8: Sc in each stitch around. <16> Start stuffing firmly. Place the safety eyes between rounds 7 and 8 leaving a 2-3 stitch gap between them.
Round 9: (Sc dec)* around <8>
Finishing: Fasten off. Stuff firmly and use your needle to sew any remaining hole closed.
Back Legs Pattern (Make 2)
Begin with a magic circle and work in continuous rounds.
Begin: Start with a magic circle and SC 8 into center. Pull circle closed.
Round 1: Sc inc in each stitch around <16>
Round 2-4 : Sc in each stitch around <16>
Finishing: Fasten off. Leave a long tail for sewing
Front Legs Pattern (Make 2)
Begin with a magic circle and work in continuous rounds.
Begin: Start with a magic circle and SC 8 into center. Pull circle closed.
Round 1: (Sc inc, Sc)* around <12>
Round 2-5 : Sc in each stitch around <12>
Finishing: Fasten off. Leave a long tail for sewing
Ears (Make 2)
Begin with a magic circle and do NOT work in continuous rounds.
Round 1: Ch 1 and turn your work. Sc, Hdc, Dc inc, Hdc, Sc <6>
Finishing: Fasten off. Leave a long tail for sewing
Assembly
Body & Head:
Start by cutting a piece of yarn about 12 inches long and threading it onto your needle.
Sew the back of the head behind the eyes to the last round of the body. Tie off and hide the ends by sewing them into the body.
Ears:
First thread your needle with the tail and fold the ear in half. Insert the needle into the opposite side of the ear and then into a Sc stitch on the top of the hippo head. Pull the yarn through and insert the needle through 2 stitches on the ear and then into a Sc stitch on the head. Tie off and hide the ends by sewing them into the body.
Repeat these steps for the other ear.
Front Legs:
Stuff one of the front legs firmly with stuffing and thread your needle with the tail. Sew the leg right below the head on the body. Make sure when placing the legs that they are even so your hippo sits properly. Once you have the first leg sewn on, tie off and hide the ends by sewing them into the body.
Repeat these steps for the other front leg.
Back Legs:
Stuff one of the back legs firmly and thread your needle with the tail. Sew the leg behind the front leg. Again make sure when placing the legs that they are even so your hippo sits properly. After you have the first back leg sewn on, tie off and hide the ends by sewing them into the body.
Repeat these steps for the other back leg.
Nostrils:
Cut 2 pieces of yarn about 12 inches long. Thread your needle with one of the pieces of yarn.
Sew around a Sc stitch on the front of the face a few times to create a nostril.
Tie off and hide the ends by sewing them into the body.
Repeat with the other piece of yarn on the other side of the hippo face.
Tail:Cut a piece of yarn about 6 inches long. Using your crochet hook, slip stitch the yarn onto the back of the hippo body on the butt. Chain down until you run out of yarn. Tie off and cut your end short. Fray the end.